Category Archives: Tips

Tutorial: How To Work a Xyron

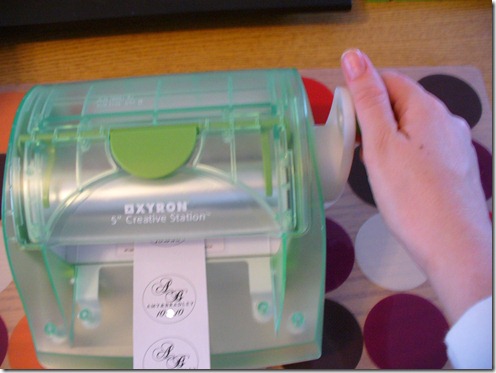
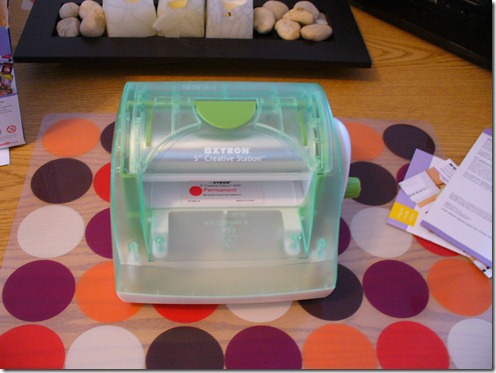
If you follow me on Twitter, you know I bought a Xyron this weekend!  Specifically, I bought this one:
Wedding DIY 005
This is the Xyron 5” Creative Station, also known as the Xyron 510. 

What is a Xyron?  According to the company’s website, it “creates stickers, labels, magnets and laminate out of almost any item.”  In a word, it’s AWESOME.  I have already made a few wedding projects with it and I know I will use it for a long time to come!

When I was first considering purchasing one, I googled and tweeted and Weddingbee-searched alot [Side Note:  Mrs. Lovebug’s wedding uses a lot of Xyron-created crafts and is a totally fun and amazing wedding!  Go check it out!].  I found a lot of cool craft projects but not a lot of “how-to” on actually working a Xyron.  This is something I would have liked to have known about before I purchased, just to make sure someone DIY-challenged like me would be able to work it.  In the end, I decided to take a risk, buy one, and if it was easy enough, create the very tutorial I was looking for.  Well, guess what, gals?  It is easy-peasy to work and requires no batteries, heat, or electricity.  Here’s how to work it:

When you open the box, your Xyron will look pretty much like the picture above, save for the fact that it will be wrapped in protective plastic.   That’s right, there’s no assembly necessary!  It comes with a permanent adhesive cartridge for making stickers, but you can buy many different kinds of cartridges for making magnets, laminating, etc.   Bonus points because you can swap cartridges in and out without having used them all the way, so you can do multiple different crafts during one crafting session.

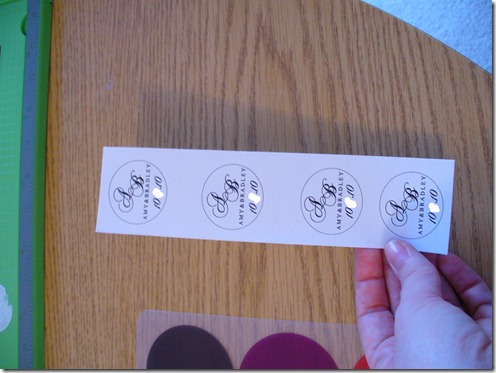
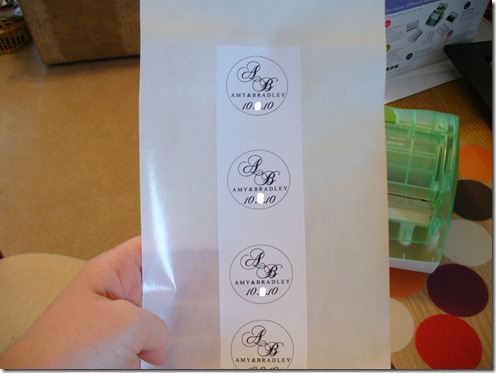
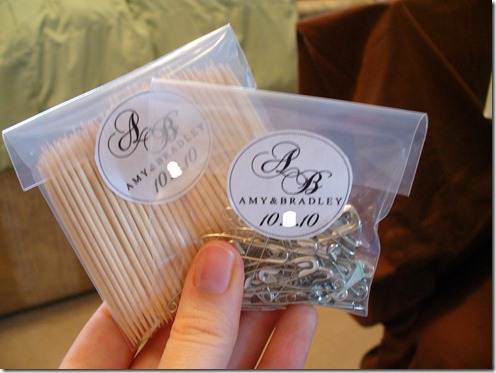
My first project was to make stickers to use to close the flaps on small bags of safety pins and toothpicks to go in our Bathroom Baskets.  I started with a sheet of one of our monogram designs, like so:

Wedding DIY 006

Because this is the 5” Creative Station, this means that it can work with items up to 5” in width.  I found this Xyron to be the most affordable, and for me, the most versatile for the type of projects I plan to do.  [Public Service Announcement:  Sign up for coupons from Michael’s!  I used a 50% off coupon on a $49.99 Xyron and got it for only $25.  Not bad at all!]

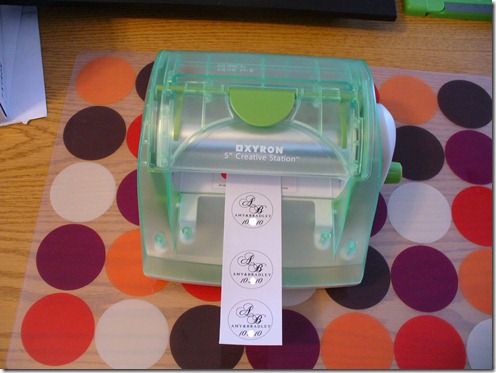
Next, insert your sheet into the machine:

Wedding DIY 007

Turn the crank:

Wedding DIY 008 
And watch it come out the other side!
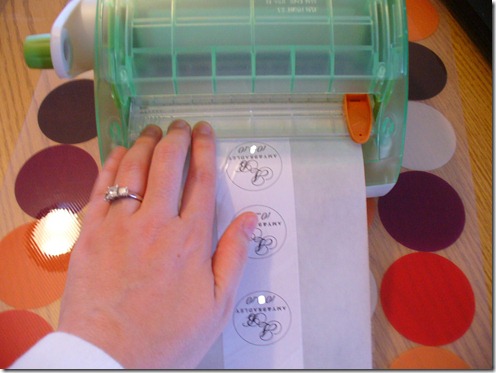
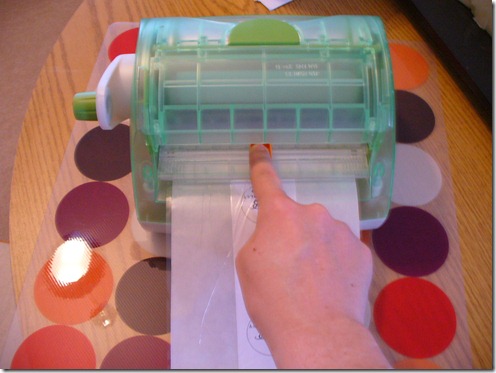
 Wedding DIY 009 Now, you hold down the clear plastic cut-guide bar-thingy (obviously not a technical term!), place your finger in the cut blade, and slide it across to cut.
Wedding DIY 010
(Once you start sliding it across, you will not need to hold down the plastic cut-guide bar-thingy anymore).
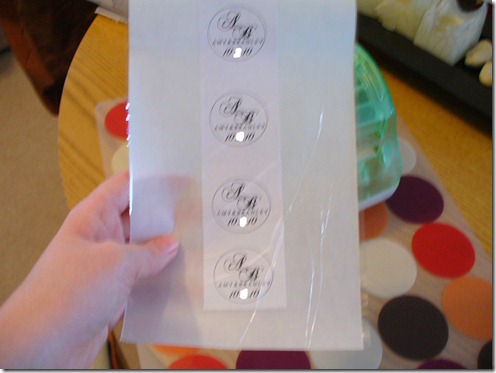
 Wedding DIY 011 Voila!  The front side of your project will have this clear, Saran-wrap-type substance on it, and the back side is a waxy-like paper.

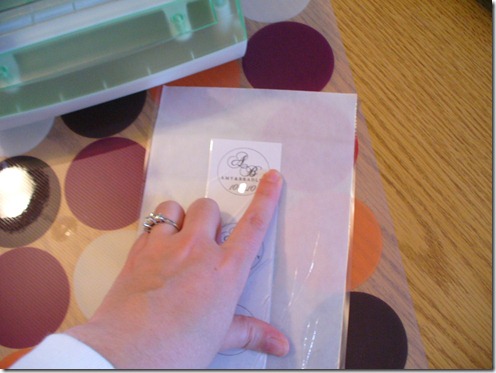
The next step is called Burnishing.  Basically, to make sure the adhesive sticks to your project properly, you need to rub the edges of your design:

Wedding DIY 012

Remove the clear front sheet and tada!  A sheet of stickers:

Wedding DIY 014

Trim and stick as you please!  Here’s my finished project for our Bathroom Baskets:
 Wedding DIY 015

Cute, no?  And way easy!  I seriously love this machine and totally recommend getting one.

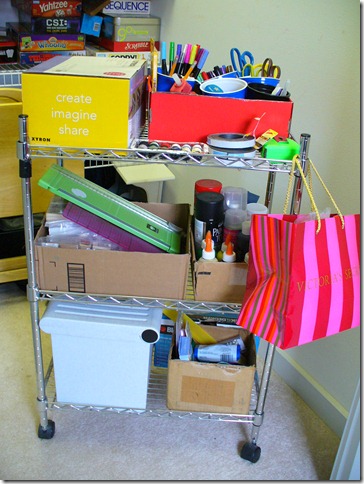
Another plus of getting the Xyron was that it forced me into cleaning out my craft cart (yes, in lieu of a closet or craft room, I have a cart).  It went from completely and utter disarray to this:

Wedding DIY 001 Ah, organized crafting bliss!

What cool machines have you used in your DIY-ing?

*All photos and date blurring by me.

6 Comments

Filed under How-To, Tips, Xyron

Breaking Up Is Hard To Do

I know, I know:  I said I would come back today to talk to you about our florist.  And I will!  I promise!  I am very excited to be working with her!!  First though, I want to talk about something a little taboo:  the break-up.

the-break-up-poster(Source)

No, I’m not talking about that kind of break-up! I’m talking about the email or phone call you inevitably have to make when you need to tell one vendor that you’ve decided to go with another.  Obviously, I interviewed more than one florist…which meant that at some point, I had to send an email to the florist I didn’t hire.

There are many schools of thought on this, but these are mine:  someone who has shared their visions of your wedding day with you and taken considerable time to write up a proposal deserves to be told one way or another if you are hiring them or not.  Granted, it’s different for every vendor and situation, but here are my general tips for writing that email:

1.  Be vague at first, but don’t be afraid to be specific later, either.  I find that it’s best at first to be a little vague—simply thank the vendor for their time but tell them you’re going in a different direction.  Good vendors—the people who you didn’t hire for one reason or another but  who still were polite, responsive and have a good work portfolio—aren’t going to berate you for not picking them.  Sometimes, after you’ve sent them the break-up email, they’ll respond back and ask you why.  If you feel comfortable sharing the reasons you aren’t going with them, many vendors are actually grateful to hear these reasons, as it helps them focus on improving their business for future customers.  I don’t feel that it’s necessary to be specific in an initial email, but if they ask, don’t be afraid to say why you are going with someone else. 

2.  Those vendors you don’t like still deserve to know.  Yes, it may be easier to forget a rude vendor rather than send them an email…but in the end, does that make you any better than them?  Better to take the high road and just politely state that you’re going in a different direction.  You can feel good that you made the right choice AND stayed polite. Which leads me to tip 3…

angry
(Source)

3.  Just because a vendor is rude to you doesn’t mean you deserve to be rude to them.  There can be a bad apple in every bunch:  Sometimes, an outrageous vendor will, in fact, have the balls to berate you about not choosing them.  Or maybe they were rude during your appointment.  Or maybe they didn’t show up to your appointment at all!  Despite those egregious errors, I subscribe to the school of thought that two wrongs don’t make a right.  Better to stay above the fray and not risk any repercussions later on (who knows who this vendor is friends with?  Especially in a tight-knit industry like weddings).  If you are not going with a vendor because he or she has been rude to you, go re-read tip number one:  be vague yet polite in your response and don’t feel like you owe the vendor any further explanation.   Even if they ask for it—continue to be polite.  Try responding with a concrete reason they can’t  argue with (example:  pricing)…and if they’re still rude?  Hit delete and move on. 

4. Keep it short and sweet.  Most likely, you haven’t developed a long-term relationship with this vendor (unless you’ve already booked them and now have to break up with them, but that’s an entirely different experience in itself).  There’s no need to write a novel—just state the quick facts and move on.  Vendors appreciate that you sent the email and didn’t waste their time with a long, drawn-out story.

shortandsweet
(Source)
Ok, maybe not THAT short and sweet, but you know what I mean!

5.  If in doubt, send one.  And by one, I mean email, of course!  Maybe you only met this person once.   Maybe you didn’t even meet them, but engaged in a few email conversations and still decided to go elsewhere.  Either way, it’s better to drop them a quick line so they aren’t bombarding your inbox with follow-ups.

Here’s an example of an email I’ve written:

Dear XXXXXXX,

Thank you for taking the time to meet with me the other day.  It was a pleasure meeting you and discussing ideas for our wedding; however, we have decided to go with a different ______________ (insert vendor type here). 

I wish you the best of luck in the future and thank you again for meeting with me!
Best regards,
Amy

Short, sweet, and to the point.  If I get a response back asking why I am choosing someone else, I am more than happy to be more specific and share. 

Keep in mind, these tips don’t apply to every situation…and I am certainly not advocating that you let yourself get walked all over by an outrageously rude vendor.  But, if you keep these rules of thumb in mind, you should be able to walk (er, email?) away from most (if not all) of your vendor meetings being seen as a responsible, polite, and easy-to-work-with customer. 

What are your tips for “breaking up” with a vendor?

1 Comment

Filed under Etiquette, Tips

Bridal Show Tips

Not only do I get to go gown shopping this weekend (!!!!!!!!!!!!!), but I am also going to be attending another bridal show in my area.

Bridal Show

Ah, bridal shows.  Double-edged sword, these babies are.  By and large, I have to say I love them, which is surprising, because I get annoyed really easily and these things are prime grounds for annoyance.  However, they are great, one-stop shopping for brides.  You can find your photographer, DJ, florist, baker, transportation, and even your venue all in one place, at one time.  Uh, hello?!  Perfect for the procrastinator or “lazy” bride, or anyone who wants to just GET. IT. DONE.  Bridal shows are also great research.  Don’t know where to start when it comes to floral or bakery, like me?  Hit up a bridal show and see vendors in action.  Taste cake, touch and smell flowers, and get a feel for the various vendors.  It’s like a Google search, but LIVE.  Awesome!

But what’s this double-edged sword, you ask?!  Well, bridal shows are chock full of brides.  Brides and their mothers, brides and their grooms, brides and their girlfriends.  Brides who won’t get out of the way when you want to speak to a vendor, brides who don’t know how to walk down aisles at a normal speed, brides and their entourages who take up too much room around booths.  Brides who, whether inadvertent or not, are completely rude, because, as all brides are entitled to feel, it’s all about THEM—even if there are 50 other brides who are planning their special day, too.  After a few hours of battling brides, it is easy to get annoyed.  Luckily, if you have some good tips and strategies, you can make the most of the bridal show and have a (relatively) painless experience!  Here are my best tips for attending a bridal show:

1) Pre-show, set up an email address that you will use JUST for correspondence.  If there’s one thing about bridal shows, it’s that you get a TON of email afterwards, and for months on end.  If you don’t want to have emails like “5 Top Honeymoon Destinations” or “20% off Invites This Week Only!” coming into your personal inbox on a regular basis, a separate email is a must.  As a bonus, you can use it for all wedding related correspondence.  Try using janeandjohnwedding@domainname.com or something like that. 

2) Bring with you a sheet of pre-printed address labels.  Another thing about bridal shows is that they get you to sign up for a LOT of stuff—you sign up to receive information, win contests, etc.  If you want to save yourself some time and writers’ cramp (not to mention avoid being one of those brides who hogs booth space), bring a sheet of pre-printed address labels that includes all your information, so you don’t have to waste any time writing.  Just slap a label on their mailing list or entry form and move on.  The labels should include:  your name, the groom’s name, your wedding date, your email address, and your home address.  Note:  if you don’t want vendors calling you, DO NOT PUT YOUR PHONE NUMBER ON THE LABEL.  Giving them your phone number means you give them permission to call you.  I NEVER put my phone number on the label because I hate sales calls and would much rather deal in email if necessary.  Same thing for your address.  If you don’t want them to send you information, don’t put your address on the label! 

3) Bring an extra tote bag with you.  Something small, like a reusable grocery bag, etc.  Every show gives you a bridal guide and a bag to carry all the information and swag you get at the booths.  Usually, the bags are from a sponsor (like a tux company) and are similar to department store shopping bags (ie made of paper)…these types of bags, when they get heavy, can cause the handles to break or the bottom of the bag to rip.  Bringing an extra tote is two-fold.  One, it prevents the aforementioned ripping of the bags or handles, and secondly, it allows you to pre-sort the information you receive.  A novel concept, I know!  Here’s the deal:  you carry one bag, your friend/mother/groom carries the other.  When you stop by a vendor’s booth and receive some information, you put the information you want to keep/research/book/review later in your bag.  Put everything else in the other bag.  This way, you have all the information you WANT to look through in your bag, and you can toss the contents of the other bag once you leave the show.  “But, Amy!” you say.  “Just don’t take the information you don’t want.”  I wouldn’t, but trust me—sometimes vendors simply force it on you.  Sometimes you take stuff thinking you’ll be interested but really, you’re not.  Use the second bag—it totally streamlines the process!

4) Bring your checkbook!  Vendors at bridal shows usually offer GREAT discounts for booking with them during the show.  You can get some serious awesome steal-of-a-deals on many wedding services.  So if you and your fiance know what you’re looking for and know what your budget is, consider booking some of your vendors at a show.  Not into impulse booking?  Most shows run two days (Saturday and Sunday, for example), so if you go on Saturday, you can always think about it and head back Sunday to book…while still getting that great deal.

5) Have fun.  This is the most important tip!  Bridal shows can be hectic, overwhelming, and sometimes even a little annoying.  But you know what?  Above all else, they’re FUN.  Where else can you walk around looking at gorgeous photography, smell and touch beautiful flowers, and taste a million different kinds of delicious cakes?  A lot of bridal expos have fashion shows, contests, even cooking demonstrations, all designed to celebrate the fact that you’re getting married.  So embrace it!  You’ll meet great vendors and get a better feel of what’s out there in your area.

What are your best tips for attending bridal shows?

1 Comment

Filed under Tips